
© Pujie.
For some watch elements it is possible to automate your layers based on data properties. For instance, when designing a custom complication, you can change the visibility of a layer based on the availability of a complication data type. Custom elements can also be automated
Automation is seperated into layer automation and property automation. Layer automation works directly on the layers like positioning, scale, translation (moving), rotation and visibility. Property automation applies to specific properties of a layer, like the fill opacity, stroke opacity, stroke width (and more..) and arc angles.
Throughout the whole interface, automation is indicated using the automation icon.
When your watch element supports automation, the app bar is slightly different from the regular app bar. The play icon is removed, and the watch face preview is not available. Those buttons are replaced by other options as discussed below,

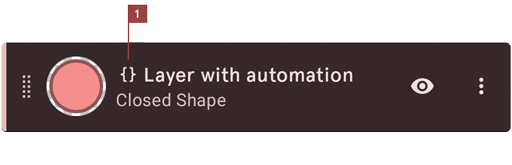
If a layer has any form of automation, this is indicated with the automation icon in front of the layer name, as demonstrated in the image below.

To automate the position, size, rotation and visibility of a layer, select the layer in the layer list and tap the automation icon next to the add layer butto.
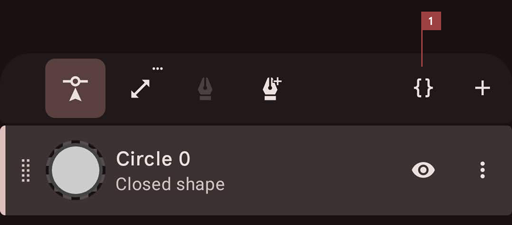
This will show the following popup menu
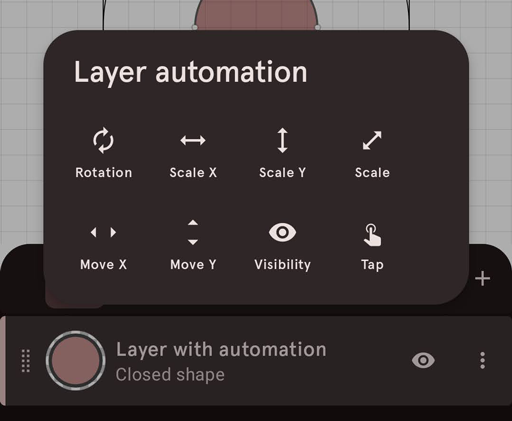
If one of the layer automation types is assigned, the button will show a darker background. Furthermore, the layer in the layer-list will show the automation icon, indicating that this layer uses automation.
Tapping one of the automation buttons will open the automation expression editor dialog, used to write your automation code. It is explained in the automation expression editor section.
To automate the layer style of a layer, tap the layer style button (see button 5 in the layer list). Then look for a property which has the automation icon next to it. Tapping this automation icon will bring you to the automation expression editor.
The image below shows that you can automate the Stroke Size and the Opacity of the Stroke by tapping on the automation icon.
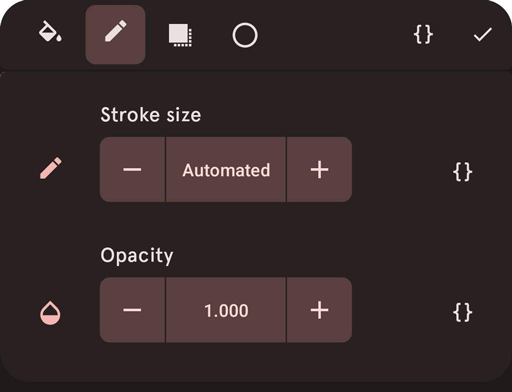
Whenever a property is automated, it's value is replaced with the text Automated. In that case the value stepper can not be used.
The following properties of the layer style can be automated
As described above you can automate the color and color type of layers as well. For this we have a couple of utility function. See the Utility functions group in the automation dialog.
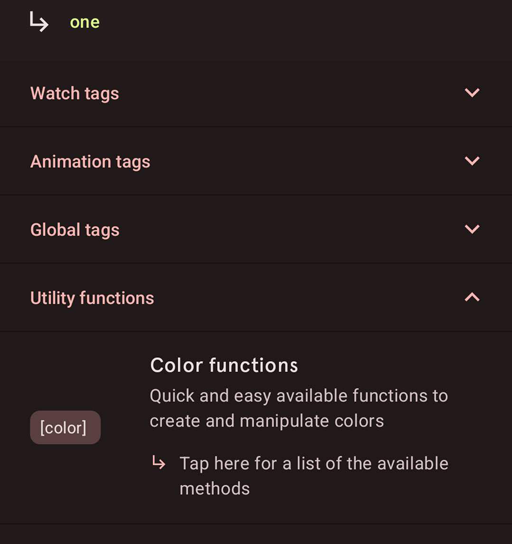
To create a solid color, you have a couple of options, these are shown below (all pure red)
To create a gradient, you can use the following functions
Note that all kinds of solid colors, can be used in the gradient color functions. Gradient color positions should be increasing, but will be distributed evenly if they are not available, a simple gradient can also be formed from just 2 or more colors, without explicit positions
To automate the arc style of an arc layer, tap the arc style button (see button 1 in the arc layers section). Then look for a property which has the automation icon next to it. Tapping this automation icon will bring you to the automation expression editor.
The following properties of the arc style can be automated
To automate the text style of a text layer, tap the text style button (see button 1 in the text layers section). Then look for a property which has the automation icon next to it. Tapping this automation icon will bring you to the automation expression editor.
The following properties of the text style can be automated
The automation expression editor is used to define the automation. This is done using a combination of JavaScript and predefined variables.
The syntax used in the automation expression editor is called JavaScript. JavaScript is a well known and extensively used programming language. It is mainly used in web enviroments, but is extremely suitable in this case, because it is relatively easy to learn, and there is a lot of documentation available online. Below you can find some good resources for learning Javascript
The image below shows the automation expression editor. In this case it was started to Automate rotation, as indicated in the title of the dialog.
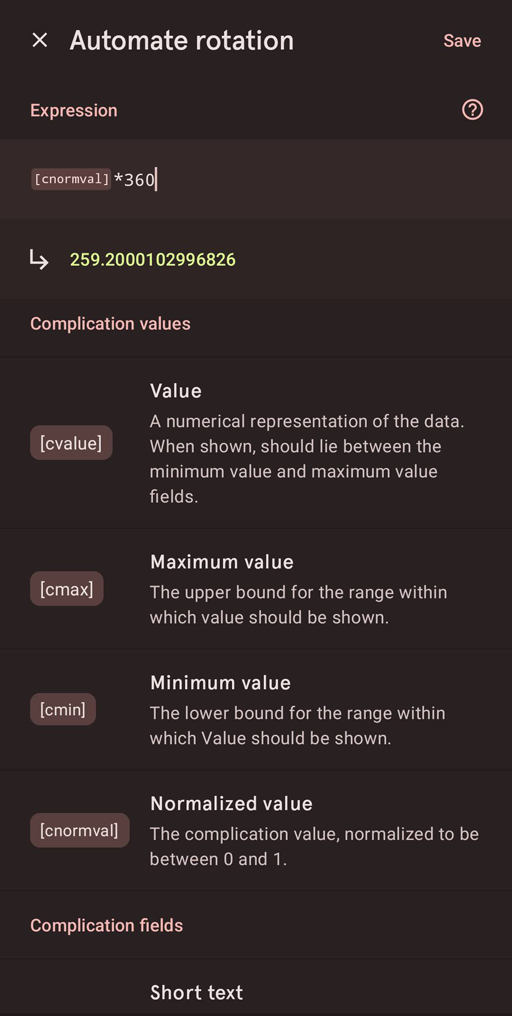
In the image above, the expression is set to the following
This will be the rotation angle for the selected layer. The normalized complication value (cnormval) is multiplied with 360 (for 360 degrees of a full circle).
When your automation expression is relatively simple and can be expressed in a single line, your expression can be stated as described above. If your expression uses more than one line of text you have to add the keyword return to the final value you want your expression to return.
In a complex automation expression you can define functions, use variables, use if statements, use the built-in JavaScript functions and more.
For example, you could write the following:
Note that the above complex example is exactly the same as the simple example above. It just uses a more complex syntax, indicating what is possible with the automation expression editor.
Because the we are using JavaScript we have access to a lot of built-in functions, especially of interest is the Math Object. For instance, this will allows you to write
Depending on the property you would like to automate, the expression editor expects a certain return type. For instance if you are automating the visibility, the expression editor expects a boolean value ( true or false ) as the return type of the expression. But if you are automating the scale of a layer, the expression editor expects a numerical value.
If your expression returns the wrong type, it will be indicated in red in the editor.

Some automation data fields are represented as objects, or arrays of objects. Those object can be easily used in your scripts by accessing their properties.
For instance the phone battery & watch battery objects, have the following data
[bat_p_obj] =
{
  level:88,
  temperature:27.1,
  status:"Charging",
  health:"Good",
  plugged:"USB",
  technology:"Li-ion",
  device: "Pixel 7",
  info: "84% (Charging)"
}
In your script you can use the properties of such an object as follows
This same principal applies to all data objects. For all the data objects, you can see their values in the automation editor. See below a video of how to see them
We currently have to following data objects
{
  "title":"Going to the city",
  "begin":{
	 "day":12,
	 "month":9,
	 "year":2019,
	 "hour24":14,
	 "hour12":2,
	 "minutes":0,
	 "ampm":"pm",
	 // offset in minutes from now,
	 // can be negative when the begin
	 // is in the past
	 "offset": 62
  },
  "end":{
	 "day":12,
	 "month":9,
	 "year":2019,
	 "hour24":15,
	 "hour12":3,
	 "minutes":0,
	 "ampm":"pm",
	 // offset in minutes from now,
	 // can be negative when the end
	 // is in the past
	 "offset": 122
  },
  "color":"#ff7537",
  "allday":false,
  // duration in milliseconds
  "duration":3600000,
  "location":"Kalverstraat, 1012 Amsterdam, Netherlands",
  // human readable begin and end time,
  // takes users clock settings
  // into account
  "time":"02:00 PM - 03:00 PM",
  "day":"today",
  // progress is a value
  // between 0 and 1, where 1 means
  // finished and 0 means not yet started
  "progress":0.2245
}
Usage Example:
var event = [cur_evnt_full];

if(event) {
   return "Current event: " + event.title;
}

return "No current event";
[ event1, event2, ... , eventN ]Usage Example:
var events = [cal_events];

if(events.length > 0) {
   return events[0].title;
}

return "No events";
Custom elements can have global variables and global functions. These are variables and functions which can be accessed from all the layers in a custom element. This makes it a lot less tedious to automate the same behavior within multiple layers. Plus if done correctly, you only have to make changes in the global variables to update all layers.
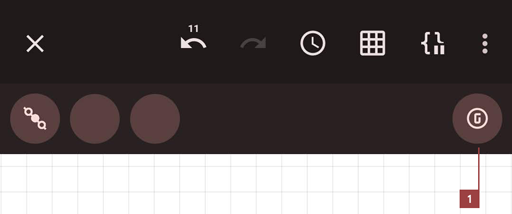
In the global variables editor you can freely add variables and functions to the global object. This is demonstrated in the image below.

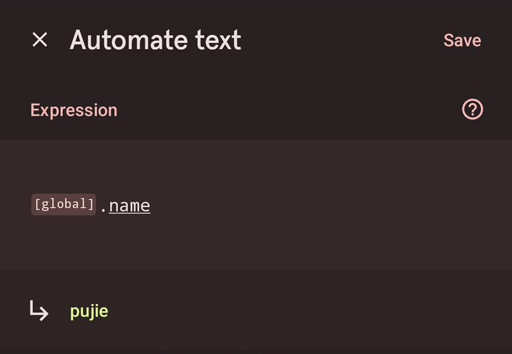
Now these global variables and functions can be used in your automation scripts. Below you can see it being used in the text automation of a text layer.
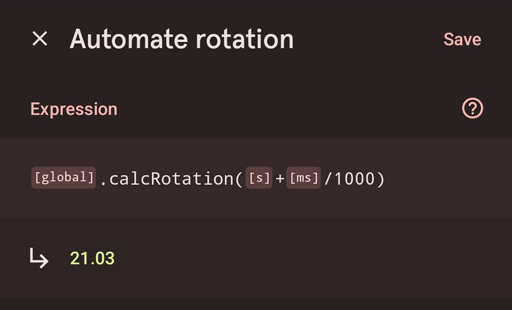
In the same manner, you can use global functions for automation too. See below an example where the calcRotation function is used to automate the rotation of a layer.
Global variables become especially useful with more complex Custom Elements. If you have multiple layers doing complex automations, re-use and centralization can make it a lot easier.
The video below gives a hands on demo of how to use global variables and functions.
With tap action automation you can call functions or change variables in your global data. This is very powerful, as it will allow you to make your elements repond to taps and change its interface accordingly.
For instance if you have a global script with the following:
And place the following in the text automation of a text layer:
And place the following in the tap action automation of a layer:
See the video below for this in action: