The building blocks of your watch elements are layers. Layers can have different types, they can be shapes (open or closed), texts, arcs, icons or images.
Use the Add Layer button to add a new layer
Then from the popup menu choose what you want to add
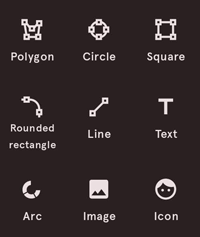
You can choose from the following options, but keep in mind that all these shapes can be edited. They are just quick start options.
LAYER TYPES
Polygon
This will enable the pen tool and will allow you to start adding anchor points to the canvas. Just tap somewhere on the canvas and the anchor points will be placed. Watch the video below to see it in action.
Circle
This will add a circle.
Square
This will add a square.
Rounded Rectangle
This will add a rounded rectangle. A dialog will be shown asking you to specify the radius of the corners and the size of the rectangle
Line
This will add a single line.
Text
This will add a text layer. Use the text button on the layers to adjust its properties
Arc
This will add an arc. Use the arc button on the layers to adjust its properties
Image
This will add an image layer. From the image styles you can select or change the image and some of it's properties
Icon
This will add an icon layer. From the icon styles you can select or change the icon
play_circle_filled
Layer list
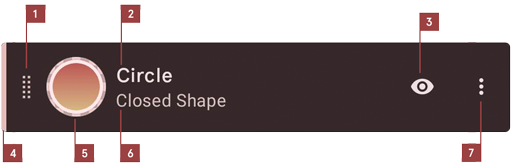
Once you have added your layer, it will be added to the layer list. A layer has the following components.
LAYER LIST PARTS
1
Drag handle
Drag and move to change the order of the layers.
2
Layer name
Double tap to change the name of the layer. (or use the context menu)
3
Visibility
Tap to toggle visibility of the layer
4
Selection indicator
Shows that the layer is selected
5
Layer style
Tap to change the style of the layer (Fill, Stroke & Shadow)
6
Layer information
Shows additional layer information
7
Context menu
Shows the context menu with additional options (Delete, Add Copy, Rename & more)
Layers can be ordered and deleted. Watch the video below to see it in action
play_circle_filled
Layer grouping
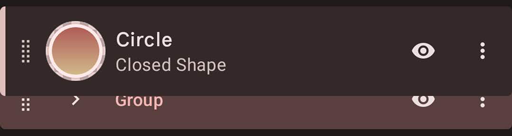
Layers can be grouped in order to transform them as a group. By long pressing a layer in the list, the tool goes into multi shape select mode. This will allow you to select multiple layers at once. The appbar will transform to the following:
After selecting the layers you want to add to a group, use the group button to create the group.
Group
Tap to group the layers
Once your group is created you can drag layers into or out of the group. When dragging a layer over a collapsed group it will show a light blue overlay to indicate that the layer will be added to the group
Groups can be expanded and collapsed. Groups can also be transformed, duplicated and copied as a whole. The video below shows how to use grouping.
play_circle_filled
Layer operations
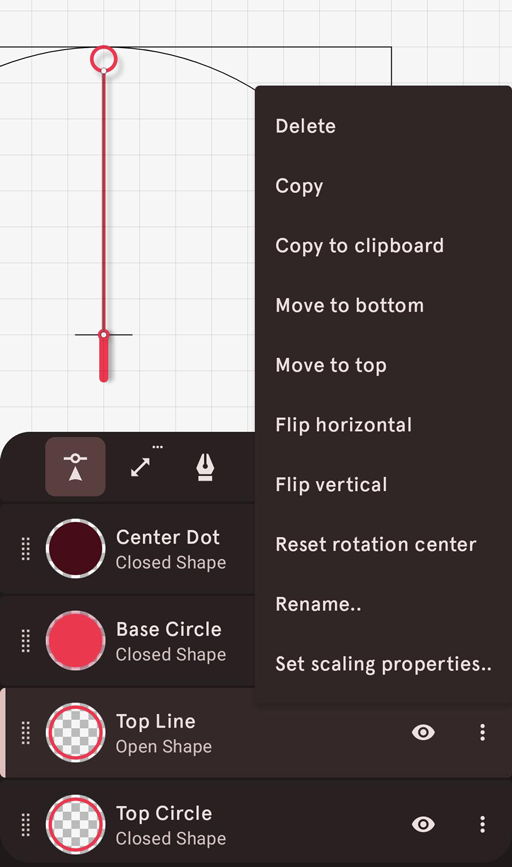
From the context menu (button 7) on the layers you can do a number of extra operations. The following image shows the options.
SPECIAL LAYER OPTIONS
Flip horizontal/vertical
This will allow you to horizontally and verticall flip your layers. N.B. text won't be flipped, but the text alignment will.
Reset rotation center
If you had previously adjusted the rotation center of this layer, this will reposition it (and keep it) in the center
Add copy
Adds a copy of the layer to this watch element
Copy to clipboard
Copies the layer or group to the clipboard, so that it can be pasted in to another watch element. Pasting is done from the overflow menu on the appbar